

Let’s set up your Ecopots indoors — step by step!
Follow this guide to keep your indoor plants happy, healthy, and thriving.
Taking care of indoor plants can be simple and fun when you start with the right pot and a little planning!
Most plants benefit from being repotted every two years, as their roots grow continuously and the soil gradually loses nutrients.
With this guide, you’ll learn how to set up your Ecopots, pick the right spot, and give your plants the best care. Let’s make your home greener, together!
Step-by-Step Guide
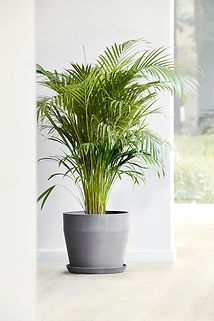
Step 1. Choose your pot and get ready
Getting the right pot is the first step to creating a happy home for your plant. Think of it like giving your plant just the right amount of space to stretch and grow.
What to do:
-
Choose the right size: Select a pot 2.5–5 cm (1–2 inches) larger than the plant’s current root ball. For tall plants, use a deeper pot; for spreading plants, opt for a wider one.
-
Prepare the pot: clean the pot thoroughly to remove any old soil or debris.
Step 2: Decide about the plug
Decide whether to remove the plug and use a saucer, or keep the plug in. For the healthiest plants, we recommend removing the plug.
With a saucer (recommended):
-
Remove the plug: Allows water to drain freely, preventing root rot and overwatering.
-
Healthier for plants: Excess water escapes, keeping roots in optimal condition.
-
Protects your space: The saucer catches runoff, keeping surfaces clean and dry.
Without a saucer:
-
Keep the plug in: Water stays in the pot, but you’ll need to water sparingly and monitor soil moisture closely.
Why it matters: Removing the plug and using a saucer ensures your plant stays healthy and makes watering easier to manage.
Step 3: Add a base layer of clay pebbles
Adding a base layer of clay pebbles ensures proper drainage and keeps your plant’s roots healthy.
To set up:
Start by adding a drainage layer of clay pebbles at the bottom of the pot:
-
Small pots (⌀ up to 15 cm) → about 1 cm
-
Medium pots (⌀ 15–30 cm) → up to 3 cm
-
Large pots (⌀ 30 cm and above) → up to 5 cm
Spread the pebbles evenly across the base to ensure proper drainage.
Design note: Include a simple illustration or cutaway diagram showing the different pot layers (drainage, soil, plant, clay pebbles on top).
Step 4: Build the base with the right soil
Choosing the right soil is essential for giving your plants the nutrients and drainage they need to thrive. A good soil mix ensures proper moisture retention and supports healthy root growth.
How to choose the soil:
-
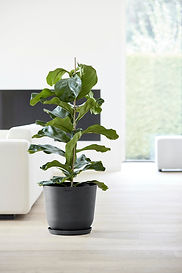
Houseplants → Use a light, well-draining potting mix.
-
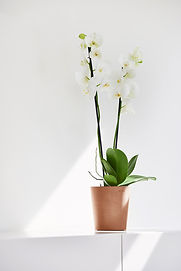
Orchids → Choose a specialized orchid mix.
-
Azaleas / acid-loving plants → Use a pH-adapted potting mix.
-
Herbs → Use nutrient-rich soil, but avoid compost blends for indoor use (can attract insects or cause odors).
How to fill the pot:
Fill the pot about one-third full to create a stable base for the root ball. Whether or not you're using a saucer, the priority is to choose the right soil and build a solid, well-drained base.
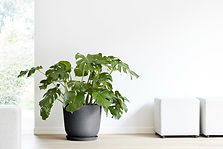
Step 5: Add your plant
Positioning your plant properly ensures its roots have the stability and space needed to thrive, while also minimizing transplant shock and promoting healthy root development.
To set up:
Gently remove the plant from its original container.
-
If it's an existing plant at home → loosen and remove some of the old soil.
-
If it's a newly purchased plant → gently untangle the roots, especially if root-bound.
Place the root ball so the top sits about 5–7 cm (2–3 inches) below the rim. Hold the plant steady before filling in the remaining soil.
Step 6: Stabilize with soil, finish with pebbles
Create a stable, well-drained soil base to support your plant’s roots, then top it with pebbles to help retain moisture, reduce evaporation, and give the pot a clean, polished appearance.
To set up:
1. Fill around the root ball:
After adding the drainage layer, gradually add soil and press lightly to eliminate air pockets. Leave some space at the top:
-
Small pots (⌀ up to 20 cm) → leave about 1 cm
-
Medium pots (⌀ 20–35 cm) → about 2 cm
-
Large pots (⌀ 35 cm and above) → about 5 cm
2. Add a top layer of clay pebbles:
Spread a 1–2 cm layer over the soil surface. This helps retain moisture, reduce evaporation, and gives a clean, polished look.
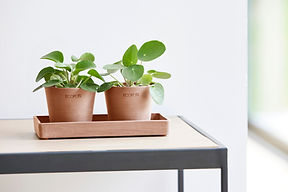
Step 7: Select a matching saucer
A matching saucer not only catches excess water but also adds a stylish finishing touch to your Ecopots setup. It enhances the overall look while keeping surfaces clean and dry.
To set up:
Choose a saucer that matches the size and color of your Ecopots, and place it underneath to catch water runoff.
Tip: For heavy pots or underfloor heating, consider a saucer with wheels — easier to move and better for floor insulation
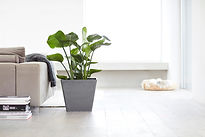
Step 8: Position your plant
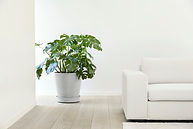
Your plant’s journey begins with finding the perfect spot. A well-placed pot ensures your plant gets the right light and stays in a stable, stress-free environment.
To set up:
-
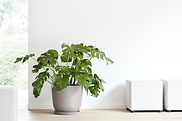
Select a location with the right light for your plant, whether it’s bright, indirect light, low light, or direct sunlight.
-
Avoid areas near heaters, air vents, or cold drafts to keep your plant comfortable.
With your pot perfectly positioned, your indoor garden is ready to flourish!

How to maintain your plants & Ecopots
Simple tips to keep your indoor plants thriving and your Ecopots in perfect condition."
Caring for your indoor plants and Ecopots is easy with a few simple practices. From regular plant care to cleaning and maintaining your pots, these tips will ensure a vibrant indoor space and keep your Ecopots as stylish and durable as the day you got them. For added peace of mind, all Ecopots come with our 10-year warranty, offering worry-free indoor gardening year after year.
Regular plant care
Indoor plants require consistent attention to stay healthy and beautiful. Following a routine helps your plants thrive in their Ecopots, even in changing indoor conditions.
Keep in mind:
-
Watering:
During the first two weeks, water from the top to help the plant settle into its new pot. After that, switch to bottom watering using the saucer to encourage deeper roots and avoid soggy topsoil.
Always check the soil before watering. Only water when the top layer feels dry. Without a saucer, be extra cautious — overwatering is one of the most common mistakes.
-
Light adjustment:
Rotate your Ecopots every two weeks to promote even light exposure and balanced growth.
However, avoid rotating sensitive plants like orchids, which prefer to stay oriented the same way.
-
Feeding:
Use fertilizer occasionally, depending on the specific needs of your plant.
Cleaning your Ecopots
Daily use and exposure to household dust can affect the appearance of your Ecopots. Regular cleaning keeps them looking fresh and stylish.
Here’s how to care for them:
-
Wipe the surface with a damp cloth to remove dirt and dust.
-
For tougher marks or light scratches, use our Ecopots Cleaning and Repair Kit, which includes a cleaning spray and a sanding pad for light restoration.
-
Rinse with clean water and allow to dry naturally.
This quick routine keeps your pots looking as good as new, adding to your indoor space’s aesthetic appeal.
Repairing scratches or heavy stains
If your Ecopots develop scratches or stains, the Ecopots Repair Sponge is designed to restore their original finish without damage.
How to use:
-
Wet the sponge lightly and gently scrub the affected area.
-
Buff the surface with a dry cloth to bring back the pot’s smooth texture.
Proper care not only maintains your Ecopots’ appearance but ensures their long-term durability. With our 10-year warranty, you can enjoy your indoor garden worry-free. Learn more here.
Are you a plant lover?
Want to be the first to discover innovative plant solutions like PlantX—the soil that keeps your plants thriving with minimal watering, so you can enjoy your holidays stress-free?
Subscribe to our newsletter for exclusive tips, updates, and early access to products that make plant care a breeze.